Image Map

Tuesday, July 8, 2014

Vegan "Wings"

I wasn't going to use this as my What's Cookin' Wednesday post, because I wasn't sure how it would turn out. However, they turned out wonderful, and, when I posted the photo on Facebook, I got several questions about them. Also, they just look so good. (:

So, here's a little quickie about these vegan "wings" I made last night.
Ingredients:
1 medium head of cauliflower
1 + 1/4 cup unsweetened almond milk
3/4 c. flour (I used whole wheat)
1 tsp. garlic powder
1 tsp. onion powder
1 tsp. curry powder
2 Tbsp. nutritional yeast
3/4 bottle of wing sauce of choice

How to:
Spray a large baking sheet and preheat the oven to 450.
Cut the cauliflower into florets.
Combine the flour, garlic, onion, and curry powders, and nutritional yeast in a large bowl.
Pour 1 cup of almond milk in another bowl, and toss your florets in.
After you've tossed them in the almond milk, toss them in the flour mixture until coated.
Transfer your florets to the baking sheet, and pop in the oven for about 20 minutes.
While those are baking, put your sauce in a pan and heat it up. Add small amounts of the almond milk until you get the desired consistency. Place the sauce in a large bowl.
By this time, they should be browned on one side. Flip them all over and turn the broiler on.
Let them sit under the broiler for about 5 minutes with the door open.
Once they're browned, pull the florets out and toss them into your sauce, mixing to give them a good coating.
Serve these up with some ranch and celery sticks!

These were really good. The texture was great, but the sauce we chose was hot! Let me know if you try these and how they turn out for you!

IKEA Wish List

We're going to IKEA!

I adore IKEA. Adore. Basically, our whole living room and kitchen (plates, utensils, accessories) are all IKEA. So, we're off to IKEA this weekend. We're also stopping at this place called Jungle Jim's near Cincinnati. I'll do a little review on that when I get back. It looks super amazing. I've been told there's a huge aisle of spices! WOO!
On to the things I love at IKEA:

Droppar Jars ($2.99-$9.99)
I NEED them.

Godis Glass ($4.79/6 pack)
We have some of these already, but I'm thinking we need a few more.

Ivrig Glass ($2.49/glass)
I love these. I'm not sure I really need all these glasses...

Bärbar Trays ($6.99 each)
These are precious.


Marmorblad Curtains ($14.99/pair)
These would look great in our bedroom. Also, they have a really cool tract system for curtains.

Krabb Mirrors ($14.99/2 pack)
I just love these.

Hopen Dresser ($199)
This matches our bedroom set perfectly. And we really just need a dresser.

Again, this is just something we need for the living room.

This is something I absolutely fell in love with at the store. I think it's just because it looks like little port holes, and I love nautical everything.
Did you see a pattern here, about how we need all these things. That's probably false. Maybe with the Jungle Jim's post, I'll do a little haul. Maybe not. Who knows!

Monday, July 7, 2014

Motivation Monday

Weight Training

I love weight training. It's a great way to get out my frustrations... with life. Somehow, only my right arm is sore from my workout on Friday. So, that's cool. I hate the myth that weight training bulks women up. In reality, when I added weights to my workout routine, I saw way more change than when I was just doing cardio.
C'mon, ladies! The more muscle you have, the more calories you burn just sitting on your ass during the day. 👍 Who doesn't like that?


Friday, July 4, 2014

DIY Planner Pages!

DIY Planner Pages


So, I wanted to show off the planner pages that I made for my notebook. I'm debating on putting these on Etsy, so please let me know if you would be interested! In case you didn't see my Friday Favorites post (here) about the notebook, it's absolutely wonderful. I love being able to completely customize my notebook/planner/whatever I want to make it.

Here's a little sneak-peek:

I'm obsessed with planning out my weekly dinners. This would be a page at the beginning of each week, with a blank back, as I would most likely tear it out at the end of the week!

When printed front and back, the calendar would have a notes page on the back for anything important I need to remember for the month (appointments, guest speakers, etc.) Both of these pages look the same for every month.

Finally, the weeks are a typical planner layout, with space for my blog post ideas and any notes for the week.

Each week has a different pattern on the top (they repeat after a while).


So that's about that!
Please let me know if you'd be interested in these planner pages, and I'll put them up on Etsy!


Friday Favorites

1. Organization

I recently got the Martha Stewart Discbound Notebook. It's amazing! It allows you to remove and move pages or accessories for the notebook wherever you want! I've also designed some planner pages and calendars that I'm going to print out and put in there! I'm going to make a separate post about the pages I've made.
Sample of the planner pages I made:


2. Dark Kiss

This is my all-time favorite body wash, that hasn't been in stock for about 2 years, and boyfriend bought me 4 of them.

3. Hair

I'm loving my hair! I was definitely ready for a change!

Wednesday, July 2, 2014

What's Cookin' Wednesday

Smoked Gouda Mac & Cheese


Sometimes, after a hard day at work, you just want a comfort meal. But, if you're like me, you're also lazy and don't want to put in too much effort. Story of my life, really. If you're like me, then this mac & cheese is for you! It's literally ridiculously delicious. Basically boyfriend's favorite meal.

Ingredients:
1 box of pasta
4 Tbsp. butter
1/4 cup flour (I use whole wheat)
1 egg
2 1/4 c. half & half
1/2 pound cheese of choice
Panko crumbs (optional)

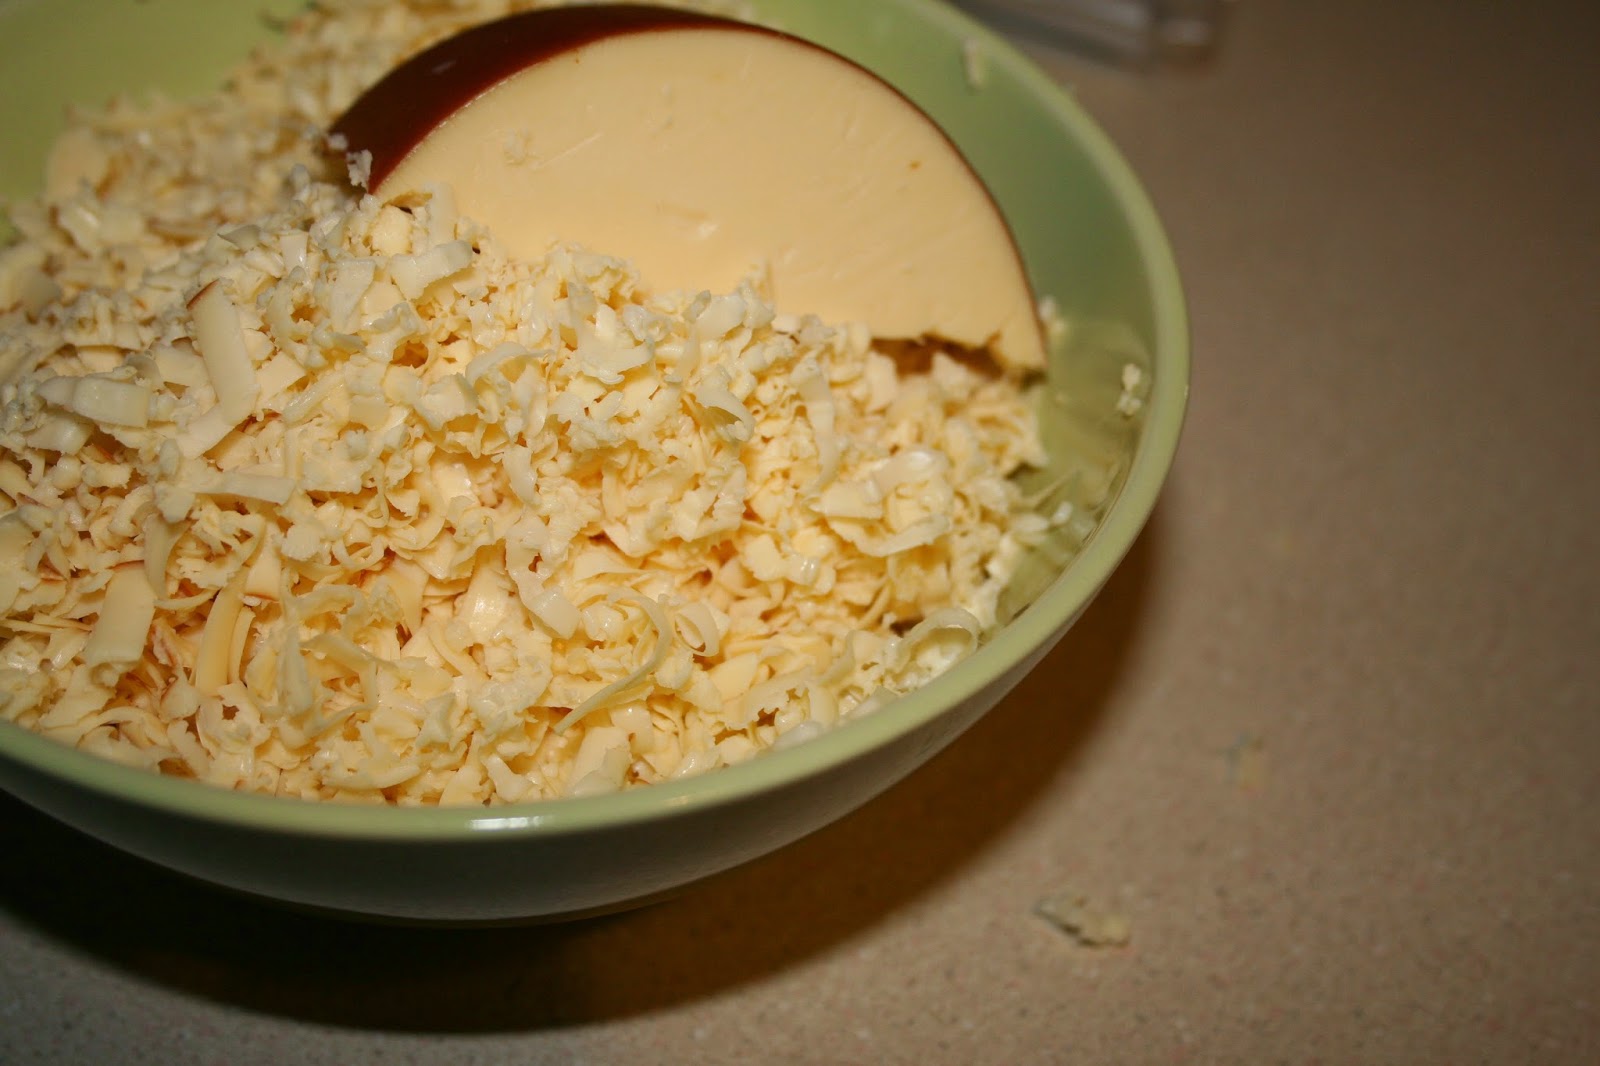
Let's start off by saying that I change the kind of cheese I use every time I make this. I usually buy my cheese at Trader Joe's because they have a good selection. The blocks, wedges, whatever are usually around 0.6 lbs, and I use the rest for sprinkling on top. This time, I got a reduced fat smoked gouda. It very well might be the best kind we've tried. A close second is the white cheddar & gruyere block.

 How to:
Start off by cooking the noodles to just before fully cooked, around 7-10 minutes. Set them aside once they're done. While that's happening, melt the butter in a sauce pan. Once fully melted, whisk in the flour. You're making a roux! Let that cook for about 5 minutes, whisking occasionally. 
Don't let it burn!!

Grate up yo' cheese! I make boyfriend do this...
At this point, I also preheat my oven to 350.

Slowly add the half & half to your roux, whisking until smooth after each addition. Let that simmer for a bit until it thickens, about 10 minutes.

Beat your egg, and add about 1/4 cup for the half & half mixture to the egg, while whisking. This is just to prevent the egg from instantly cooking when you throw it in the pan. After it's all whisked, add the egg mixture to the pan, and stir until incorporated.

Next, pile in your cheese and stir that around until smooth. With the smoked gouda, it never really got smooth because of the rind.

Once your cheese sauce is smooth, you can toss your noodles in and stir!

Squish all that into a greased glass pan. I usually use a 9x13.

Sprinkle with the remainder of the cheese, panko crumbs, and freshly grated pepper, and pop it in the oven for 20-25 minutes. Around this time, I turn the broiler on for 1-2 minutes, just to get the top a little crispier. It's not necessary, though.

Here it is, in all of it's baked goodness:


Literally, smoked gouda might be the best one we've tried. It's so good.
Let me know if you try it out and how it goes for you!
Monday, June 30, 2014

DIY Burgundy Hair!

I dyed my wig!

I color and cut my own hair. All the time (my hair is too long to see a real difference when I trim it). It could totally be because I'm a cheapskate, but I also just love to experiment. And I get bored with my hair easily. So, I've been a blonde for about 2 years now, and I was dying (see what I did there?) for a change. I've been in love with the maid's hair in American Horror Story since I first saw it, so that's what I went for. With a little twist.

Process:
Since I had really light hair, I knew this was going to be a bit of a process. I started with Ion Color Brilliance, in 7IR Medium Intense Red Blonde, thinking it was dark enough to do the trick.
Here's how that turned out!

Hey, Ariel! Is that you!?

Yes, yes it is. My hair was like, primary red after the first dye. Not exactly what I wanted, but I liked it. I've always wanted fire engine red hair, so this satisfied that need. However, this wasn't going to cut it for work.

The second time, I used Ion Color Brilliance, in 6RV Light Burgundy Blonde. It's a darker, more vibrant color that I hadn't seen the first time.
After the second round of dye, it was the American Horror Story maid hair color that I wanted! I've gotten a ridiculous amounts of compliments over it everywhere I went. I love it. In the sun, it looks super red, but in normal lighting, it's a nice dark/vibrant burgundy.

I did a masque after my second round, and OMG. This stuff is amazing. Amazing. It made my hair ridiculously soft.

 I love this color, and I can see mixing it with other colors to get the exact burgundy you want. I'm sure you could mix this color with a brunette or even a bit of black to make it less of a vibrant color!